Surgical Instrument Sterilization and Cleaning: Methods, Steps and Best Practices
Every reusable surgical instrument goes through the same loop: used on a patient, cleaned, inspected, packaged, sterilised, stored, and used again. If any step in that loop is weak, the patient pays for it through infection, and the hospital pays for it through damaged instruments and cancelled cases. Surgical instrument sterilization and cleaning is therefore one of the most important routines in any healthcare facility.
This guide explains the difference between cleaning, disinfection, and sterilisation, walks through the standard reprocessing steps, compares the main sterilisation methods, and lists best practices that extend instrument life. It is written for central sterile services departments (CSSD), operating room teams, and procurement staff who need instruments built to handle repeated cycles.
Cleaning, Disinfection and Sterilisation: What Is the Difference?
- Cleaning physically removes blood, tissue, and debris. It is always the first step, because soil left on an instrument can shield microorganisms from the sterilising agent.
- Disinfection reduces the number of microorganisms on an item. High-level disinfection destroys most organisms but not all bacterial spores.
- Sterilisation destroys all forms of microbial life, including bacterial spores.
Which level an instrument needs depends on how it is used. Items that enter sterile tissue or the vascular system, such as scalpels, forceps, and needle holders, must be sterilised. Items that touch only mucous membranes may be disinfected at a high level, in line with local guidance.
Step-by-Step Instrument Reprocessing Workflow
Step 1: Point-of-Use Treatment
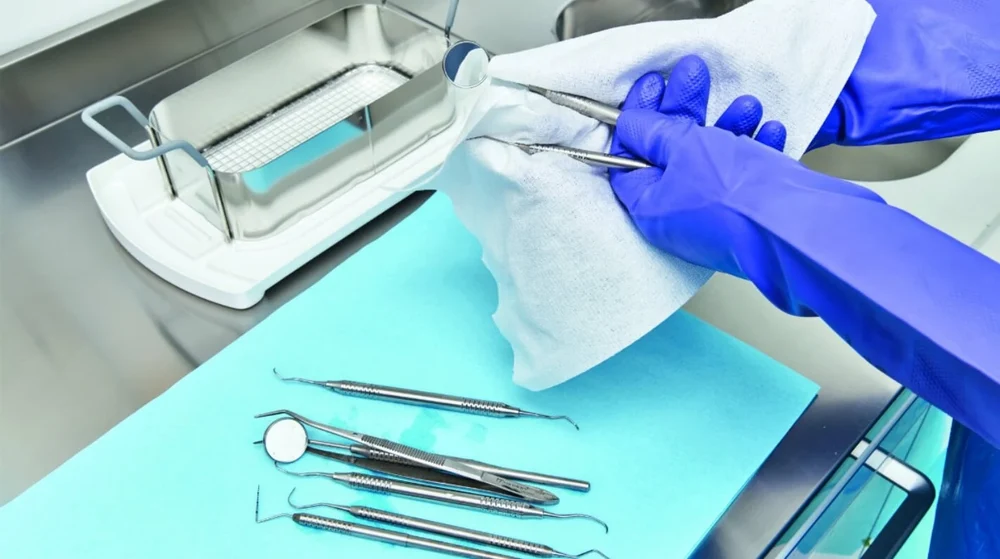
Begin as soon as the case ends. Wipe visible soil from the instruments and keep them moist, using a damp towel or an approved pre-cleaning spray, so blood does not dry on the surface. Open ratcheted instruments, separate sharps, and place everything in a closed, labelled container for transport.
Step 2: Transport and Sorting
Move instruments to the decontamination area promptly. Sort them by type and fragility. Heavy retractors go in a separate basket from delicate scissors and micro instruments, so weight does not damage fine tips.
Step 3: Manual Cleaning
- Disassemble multi-part instruments where the manufacturer allows it.
- Soak in an enzymatic or neutral-pH detergent at the dilution and temperature the product label specifies.
- Brush hinges, serrations, box locks, and channels with soft, appropriately sized brushes, working below the water surface to limit splashing.
- Avoid steel wool and harsh abrasives, which scratch the finish and create places for corrosion to start.
Step 4: Ultrasonic Cleaning and Automated Washing
An ultrasonic cleaner reaches into box locks, serrations, and joints that brushes miss. Use fresh, degassed solution and do not overload the basket. Many facilities then pass instruments through a washer-disinfector, which cleans and thermally disinfects in a validated cycle. Instruments from different metals should not be mixed in one load.
Step 5: Rinsing and Drying
Rinse with clean water. Final rinse water quality matters, because mineral deposits cause staining and spotting. Dry instruments thoroughly, since residual moisture promotes corrosion and can compromise steam sterilisation of packaged sets.
Step 6: Inspection and Lubrication
Check every instrument under good light. Look for remaining debris, rust, cracks, loose joints, misaligned jaws, and dull cutting edges. Test ratchets and scissor action. Apply a water-soluble, steam-permeable instrument lubricant to hinges, if your facility protocol includes it. Remove damaged instruments from circulation and send them for repair or replacement.
Step 7: Assembly and Packaging
Arrange instruments in perforated trays or instrument trays with covers, with hinged instruments open and heavy items at the bottom. Use rigid containers such as an instrument sterilisation box or wrap the tray in approved packaging. Include a chemical indicator inside each set and label the outside with the contents, date, and load number.
Equip Your CSSD With Durable Trays, Containers and Drums
Medical-grade stainless steel trays, sterilisation boxes and drums made for repeated cycles.
BROWSE TRAYS & CONTAINERSStep 8: Sterilisation
Load the sterilizer according to the manufacturer’s instructions so steam or gas can reach every surface. Do not stack trays so tightly that they block circulation. Run a validated cycle and record the load.
Step 9: Cooling, Storage and Distribution
Let sterile packs cool in a controlled area before handling, because moisture on a hot pack can draw contamination through the wrap. Store packs in clean, dry, closed cabinets away from damp walls and floors, and rotate stock so the oldest packs are used first. Check that packaging is intact before use, and discard any pack that is torn, wet, or dropped.
Comparing Main Sterilisation Methods
| Method | How it works | Best suited for |
| Steam (autoclave) | Pressurised saturated steam at high temperature | Heat- and moisture-tolerant stainless steel instruments and trays |
| Ethylene oxide gas | Low-temperature gas that needs aeration afterwards | Heat-sensitive devices and some complex items |
| Hydrogen peroxide gas plasma | Low-temperature vapour and plasma | Heat-sensitive instruments and some endoscope accessories |
| Chemical high-level disinfection | Immersion in a validated liquid disinfectant | Semi-critical items that cannot be sterilised, per local guidance |
Steam sterilisation is the first choice for reusable stainless steel instruments because it is reliable, fast, and leaves no toxic residue. Hospitals commonly use a electric autoclave for smaller loads and a horizontal cylindrical autoclave for higher volumes. Exact temperatures and exposure times depend on the cycle type, the load, and the instrument maker’s instructions, so always use validated parameters in line with standards such as AAMI ST79 in the United States or ISO 17665 internationally. For immersion disinfection, a Cidex tray keeps instruments fully submerged for the required contact time.
Monitoring That Proves the Cycle Worked
- Mechanical monitoring: check and record time, temperature, and pressure for each cycle.
- Chemical indicators: placed inside and outside each pack to show it was exposed to the process.
- Biological indicators: spore tests run at regular intervals, and for every load that contains implants, to confirm that the sterilizer kills resistant organisms.
- Air-removal testing: for pre-vacuum steam sterilizers, a daily test confirms air is removed properly.
- Records: keep load logs so any problem can be traced back to the instruments in that load.
Best Practices That Protect Instruments and Patients
- Never let soil dry on instruments. Dried blood is much harder to remove and can harbour organisms.
- Avoid saline and harsh chemicals. Saline and chlorine-based products can pit stainless steel. Use detergents intended for surgical instruments.
- Keep metals separate. Mixing stainless steel with other metals in a wash can cause staining or galvanic damage.
- Protect sharp and fine instruments. Use tip guards and keep micro instruments in dedicated trays.
- Do not overload trays. Overloading blocks steam penetration and can lead to wet packs.
- Train and audit. Reprocessing is a technical skill. Provide regular training, competency checks, and audits of every step.
- Follow the manufacturer’s instructions for use for every instrument, especially for items with lumens, optics, or electrical parts.
Choosing Instruments Built for Repeated Reprocessing
Reprocessing works best when the instruments are designed for it. Medical-grade stainless steel with a properly passivated surface resists corrosion, smooth joints are easier to clean, and stable alignment survives repeated cycles. Ask suppliers how their instruments are finished and tested, and request clear reprocessing instructions.
Why Choose Salwan Surgicare
Salwan Surgicare manufactures surgical instruments and sterilisation accessories for hospitals and distributors worldwide, with FDA, ISO 13485:2016, ISO 9001:2015, and CE certifications. Instruments are made from medical-grade stainless steel with controlled machining, polishing, and passivation so they hold alignment and grip through repeated sterilisation cycles. Every product carries a one-year quality guarantee, and bulk orders ship with export-ready packaging and documentation. Explore the dressing drum and other CSSD essentials alongside the full general surgery instruments range.
Conclusion
Good surgical instrument sterilization and cleaning depends on discipline at every step: clean at the point of use, wash and inspect carefully, package correctly, run validated cycles, monitor the results, and store properly. Pair that discipline with durable instruments and sound trays, and you protect patients and extend the life of every set you own.
Get a Custom Quote for Instruments and CSSD Accessories
Consistent quality, export-ready packaging, and reliable supply for hospitals and distributors worldwide.
REQUEST A QUOTE